Coin counting machine
Context
As I mentioned in the "Android Learning" article, by this time I had already entered my current university. I chose to study engineering in mechatronics.
In my first year of engineering I had an introductory subject to mechatronics. In this subject we saw many basic things about vectors, programming and electronics.
In March 2021, the teacher of said subject asked us to form groups of 4 people to do a final project, which we had to hand in by the end of May 2021.
That project would have to have something mechanical (moving), it had to be powered by electricity, and we had to have programmed some kind of code. Also, it had to be something functional for daily life. If that mechanism represented something very big, we could do it on a small scale. For example: an elevator, a crane, a car, etc.
As it was our first year and theoretically we didn't know anything about it, the teacher taught us from time to time to use Arduino. He was teaching us how to make some connections and how to make simple programs. For example, he taught us to turn on a led, or how to turn a little motor.
An Arduino board is a device that serves to facilitate the use of electronics. This is achieved by programming different electrical behaviors in each of its pins, thus being able to create many types of circuits.
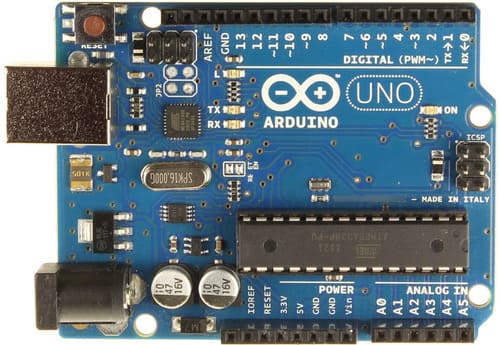
The best known Arduino board (and the one we were going to use) is called Arduino UNO.
Start of the project
As we were in a pandemic, apart from the fact that it was somewhat illogical or irresponsible to do physical work as a team, the 4 members of the team lived very far from each other, so it would be even more complicated to carry out the project.
We had only 2 possible solutions: 1.- not hand in anything, or 2.- that only one person do all the work (assembly, connections, etc.).
In the end we decided to do the second option. One person would do the entire project and the others would simply contribute the money necessary to buy the material.
Since I already had programming knowledge and had already taken some electricity and electronics subjects in my life, the whole team decided that I would do the work, while the rest of my team would only send me the money to buy all the Necessary parts (The Arduino, cables, breadboard, sensors, etc.).
Since no one of us worked, we had almost no money, so the materials that were not electronic parts would be the cheapest (even recycled) such as: cardboard, illustration board, wooden sticks, etc. ♻
Since I would do the work, they let me choose the type of machine to create. I decided that it would be a coin counting machine.
It would be a machine that would only count $1 coins so as not to make it so complex.
However, to make it not look too simple and to give us a better score, I suggested to my teammates that we could make the machine "more technological" without spending more money. I proposed that the machine not be controlled with buttons, but with an Android application via Bluetooth, so that it would not only have what the teacher requested, but it would have much more added value because it would have different technologies and would use telecommunications.
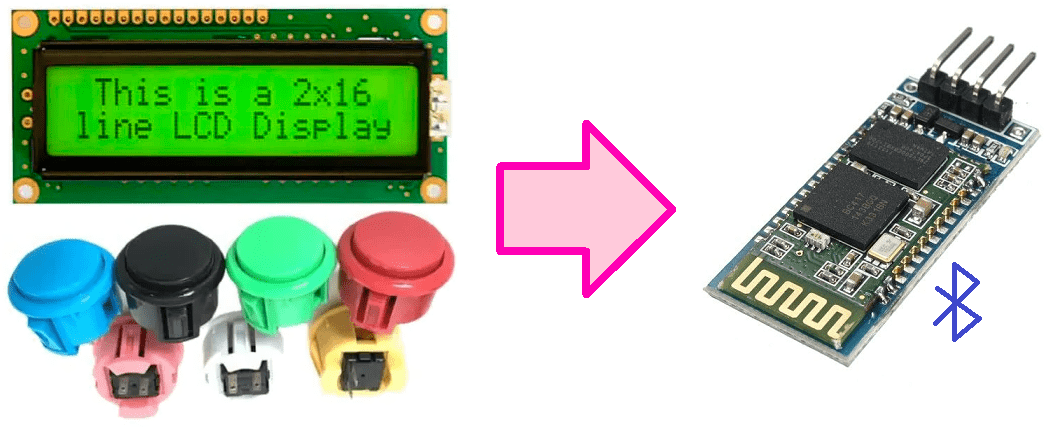
Therefore, among the material that I ordered online, there were no buttons or displays, but instead there was an HC-06 Bluetooth chip.
As seen in my previous projects, I had never used an Arduino and had never worked with Bluetooth connections. But I was confident that it could work.
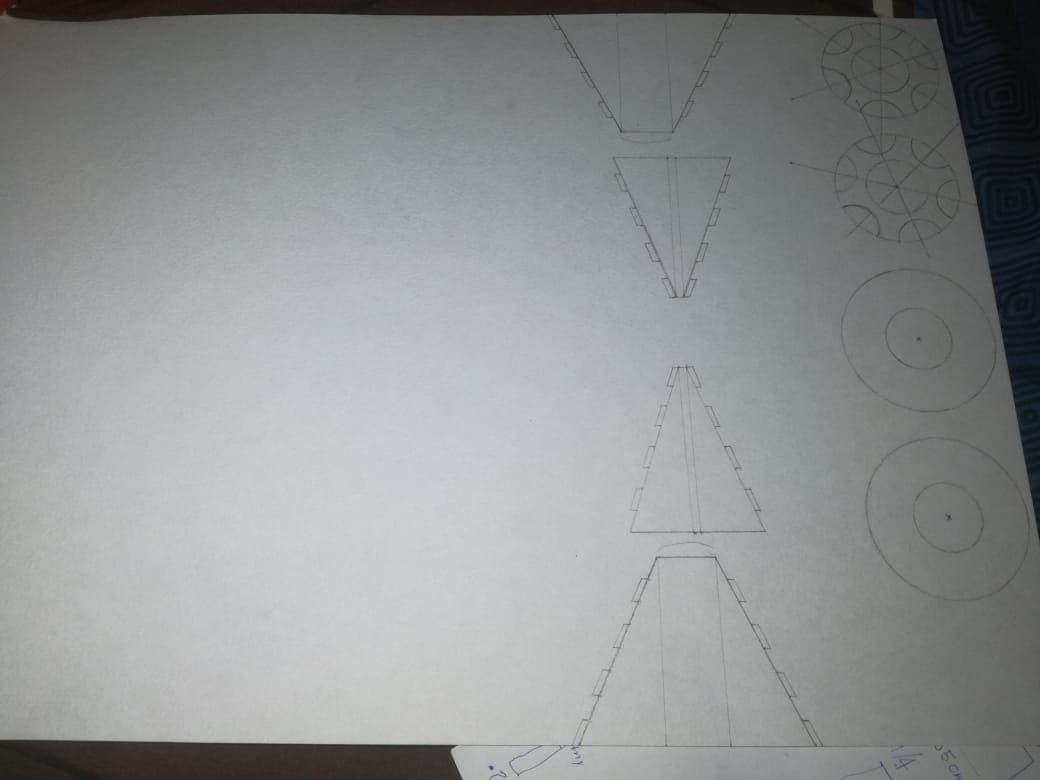
First machine sketches
The machine would physically have 4 sections:
- A hopper or coin storage box.
- Gear to move coins one by one.
- Coin detection sensor.
- Coin output tray.
Everything would be contained within a small cardboard box, except for the coin input tray and the output tray.
This is a sketch of my initial idea (in the end, it will be modified a bit).

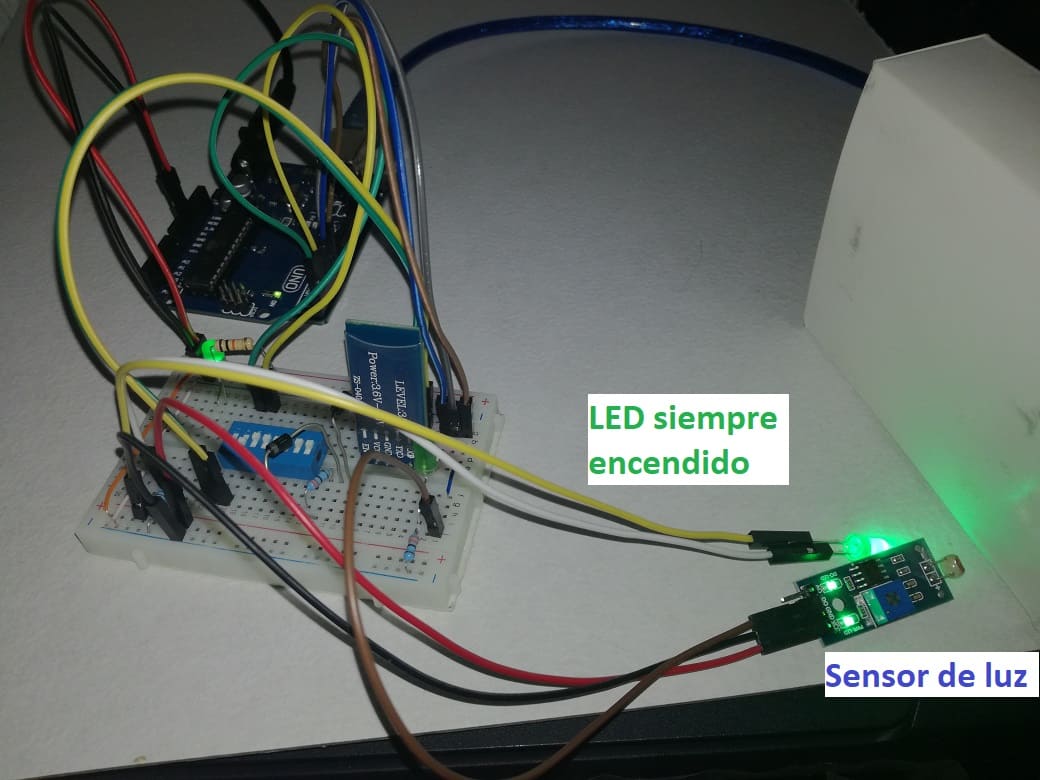
The sensor was going to detect every passing coin. By doing so, the Arduino would know and determine if it should continue turning the coin gear.
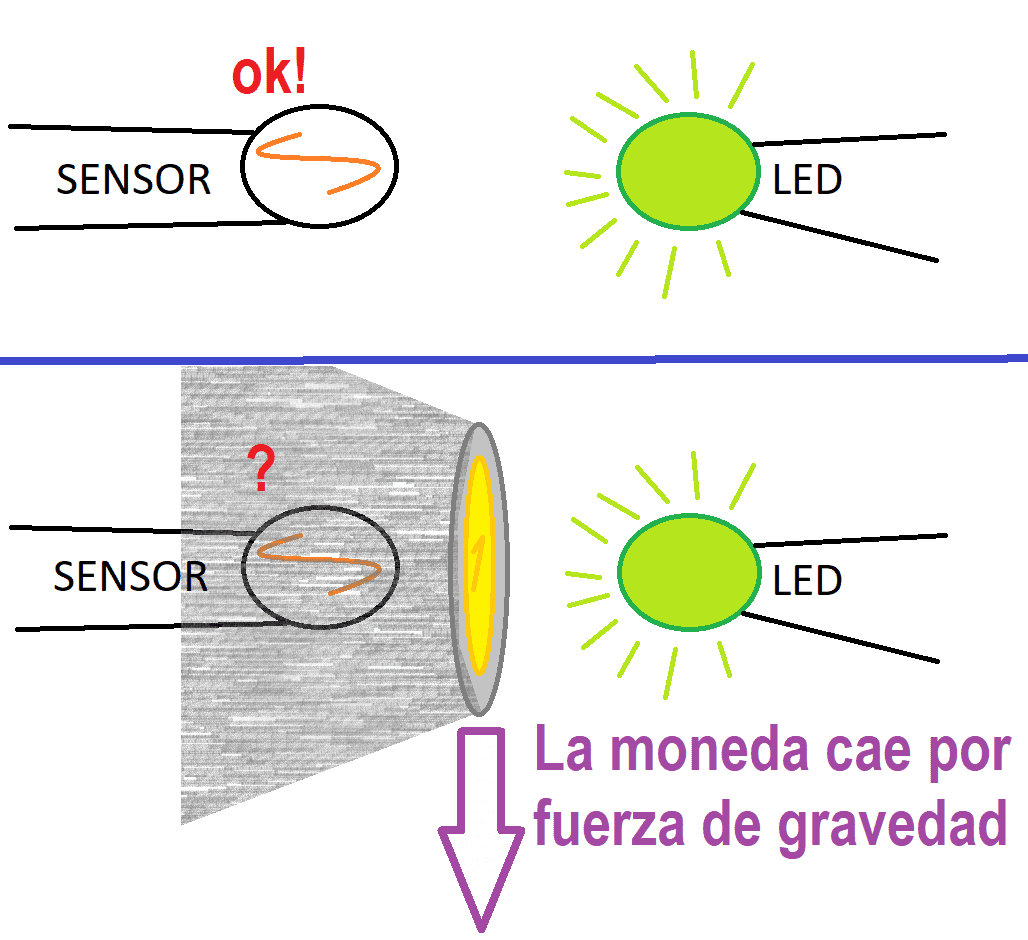
To detect the coins, I had initially thought of using a motion detector, but later realized that the motion sensor was too inaccurate for this job, so I used my second plan. I would use a light detector.
In the coin detection area there would be a led light on all the time pointing towards the sensor. The moment a coin falls right into a space between the detector and the lit led, the coin would block the passage of light, causing the sensor to detect an "anomaly". That would mean for the Arduino that a coin had passed 😉.
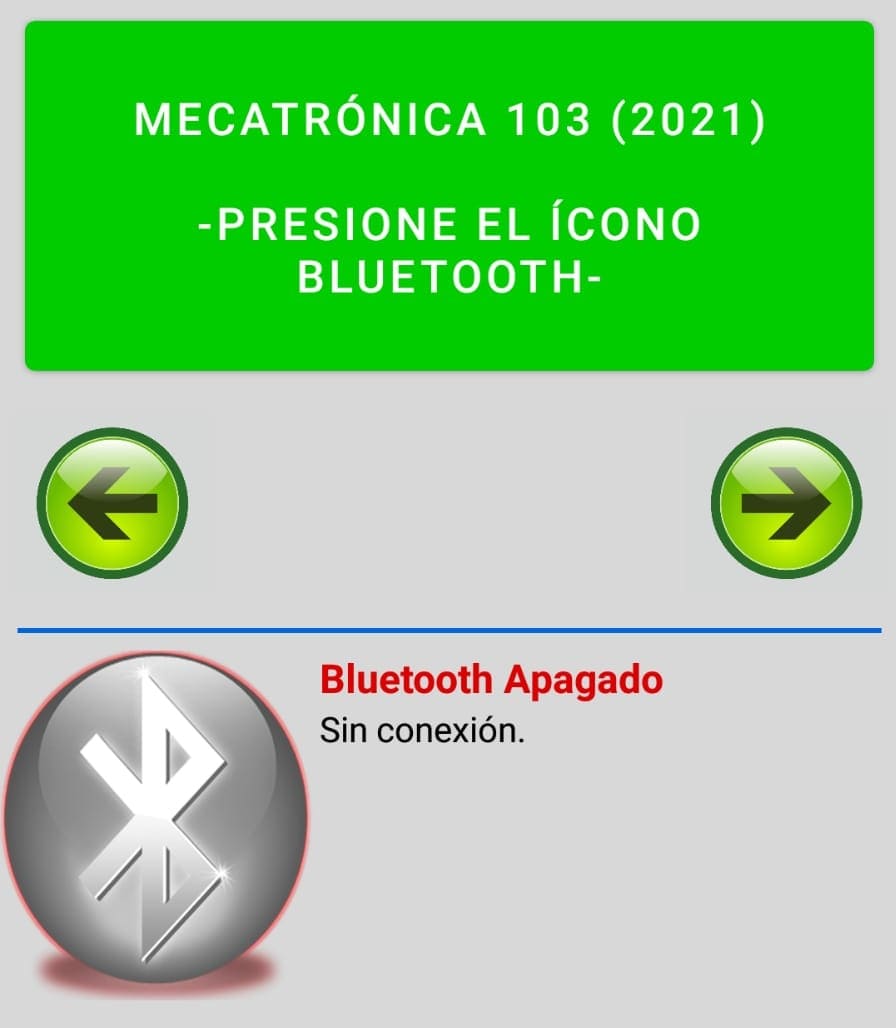
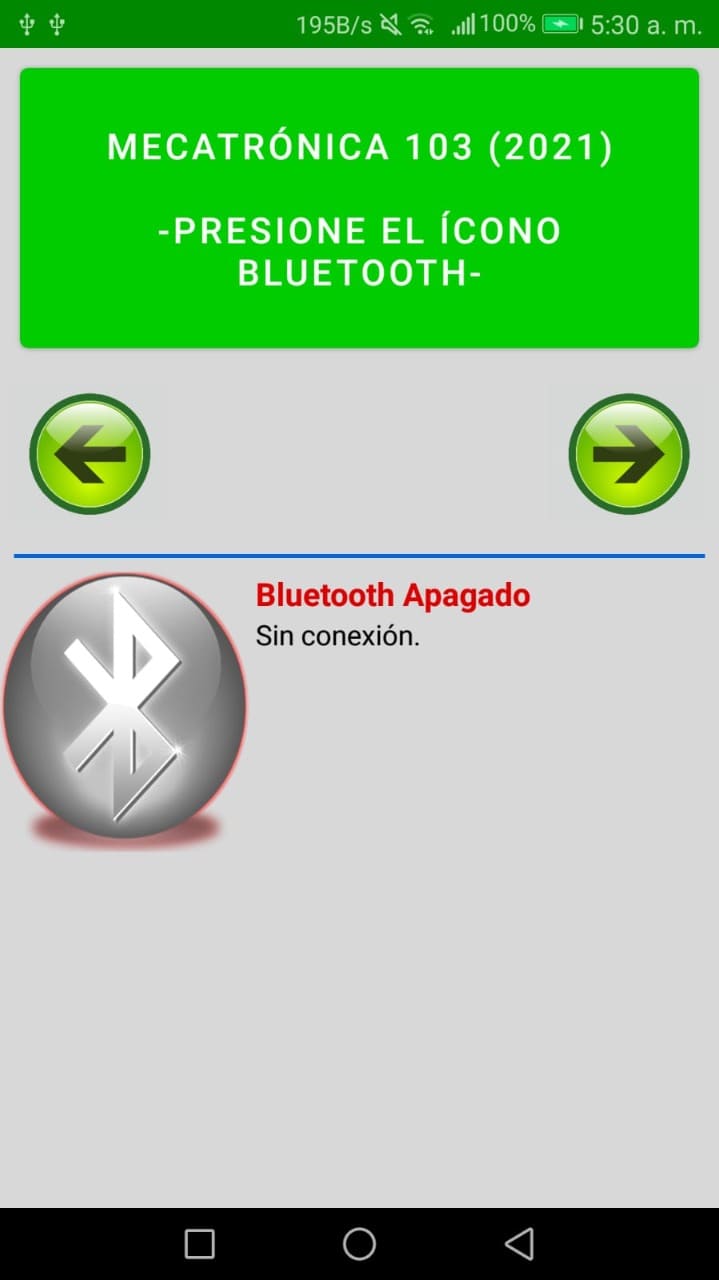
All the instructions would be sent from the phone to the Arduino, and in turn, the Arduino would be informing the whole situation in real time with the coins counted, all this information appearing on the phone.
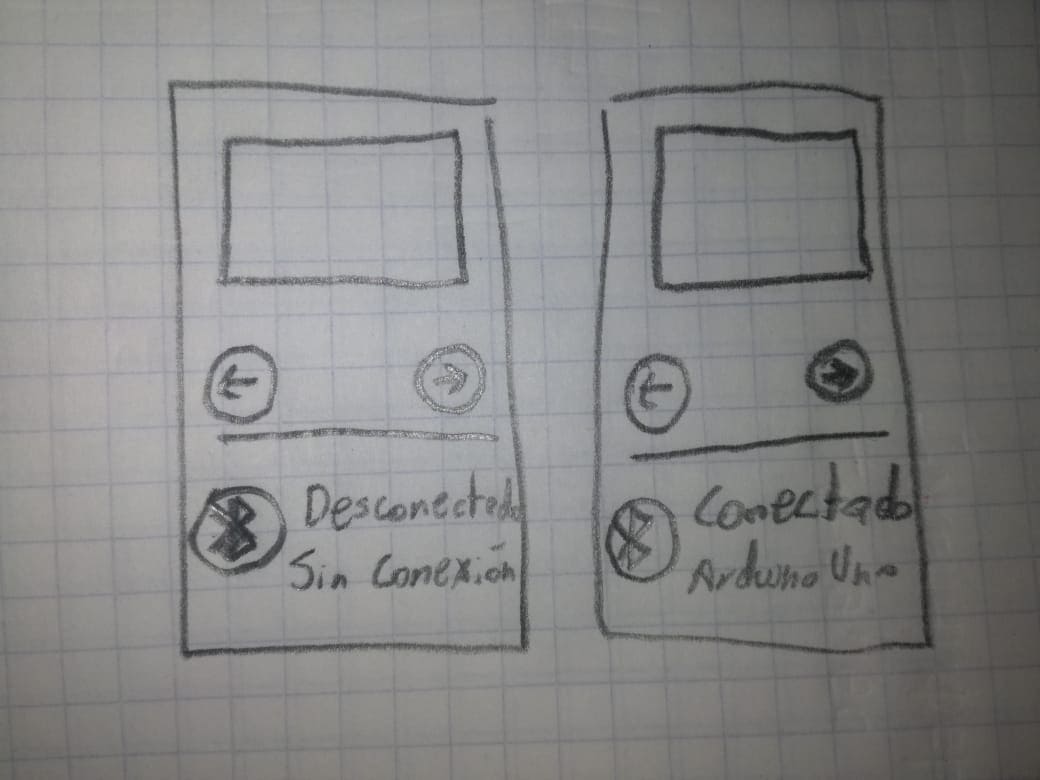
The phone application would have the following elements:
- 1 clickable display to accept an action.
- 2 buttons to change function.
- 1 button to connect or disconnect from the machine.
This is a little sketch:
The functions that could be done with the machine would be:
- Give a specific amount of coins required.
- Count all the coins that the machine had.
- Empty all the coins that the machine had without counting them. This might be silly, because it's almost the same as the previous option, but it would add more features to the machine 😆.
Programming
As I already said, I had never programmed with Bluetooth technology, nor had I ever used an Arduino, so I had to do a lot of research on these topics to understand them well and know what can be done and what can't be done, which consumed me time, and what the teacher was teaching us about Arduino from time to time was not enough compared to what I had to investigate.
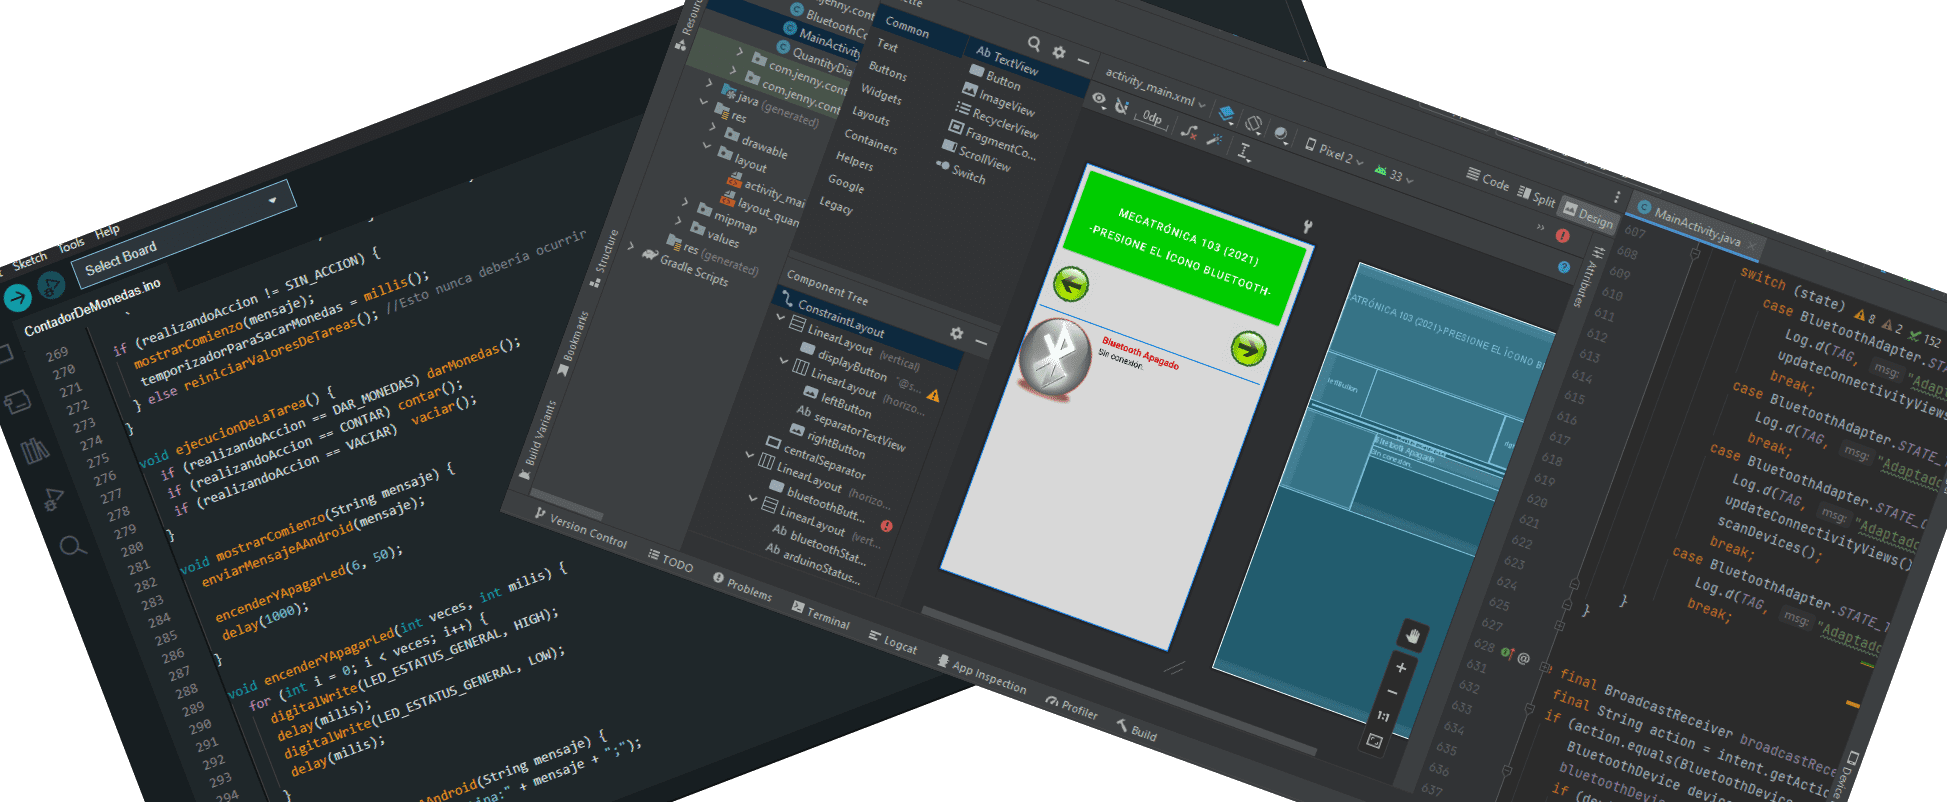
The first thing I did was create the android application with all the buttons, and make them work, at least 3 of them, since the Bluetooth button would be more complex, because I would also have to program it on the Arduino side.
The next thing I did was program the Arduino's Bluetooth to accept the phone connection (still nothing could be sent or received).
The next thing I did was program the Bluetooth button in the app, which did the following things:
- Activate the Bluetooth of the phone (in case it was deactivated) and try to connect to the Arduino. If it was connected, it turned blue and the functions that could be performed appeared on "the display". If it did not connect, an error message would appear, and you could try again. In order for the phone to connect to the Arduino, it was not necessary to give it any option to search for a device, nor did you have to enter a password other than the first time, since I programmed it to do everything automatically (it took me a while to learn how to do this 🤯).
- Disconnect from the Arduino (if it was already connected).
- It detected all the possible errors, for example: if the connection was lost after having established it due to some problem.
The next thing was to learn how to send information from the phone to the Arduino. I also made that when the Arduino was connected to the computer via USB, it would show the information it received from the phone on the console.
Then I did the same, but in reverse. I made the Arduino send information to the phone.
To avoid possible communication errors or someone or something interfering with the signal, I invented a nomenclature that had to be followed. It was a combination of symbols that had to be read one after the other. If a symbol was missing or a symbol was incorrect, the request was rejected. This is because there are all kinds of waves and frequencies in the environment, and although it is unlikely, there is the possibility that one of them could alter a request a bit and, for example, suddenly appear on the Arduino: "R " or "a" or "7" or "&", without knowing why or who sent that letter, then it is rejected and not given importance.
I named the Arduino and the phone to identify them in the nomenclature I had invented. The Arduino would be called 'Robotina', and the phone would be called 'Xj9'. These names are in honor of 2 cartoon robots (in Latin America, Rosie the robot is known as Robotina).

The nomenclature was: =>RobotName:action();
Next, I show a small communication of the 2 devices:
=>Xj9:giveCoins(3);
=>Robotina:coinsGiven(1/3);
=>Robotina:coinsGiven(2/3);
=>Robotina:coinsGiven(3/3);
For me, this was something amazing. I could send letters or symbols through the air 😀. All these instructions were received by both devices internally, that is, nobody saw them (unless they were connected to a console).
Finally, I made this communication make sense, that is, when sending an instruction, Arduino would do something (turn on leds representing the motor or passing coins), and that when the Arduino responded, all the information would appear on the phone.
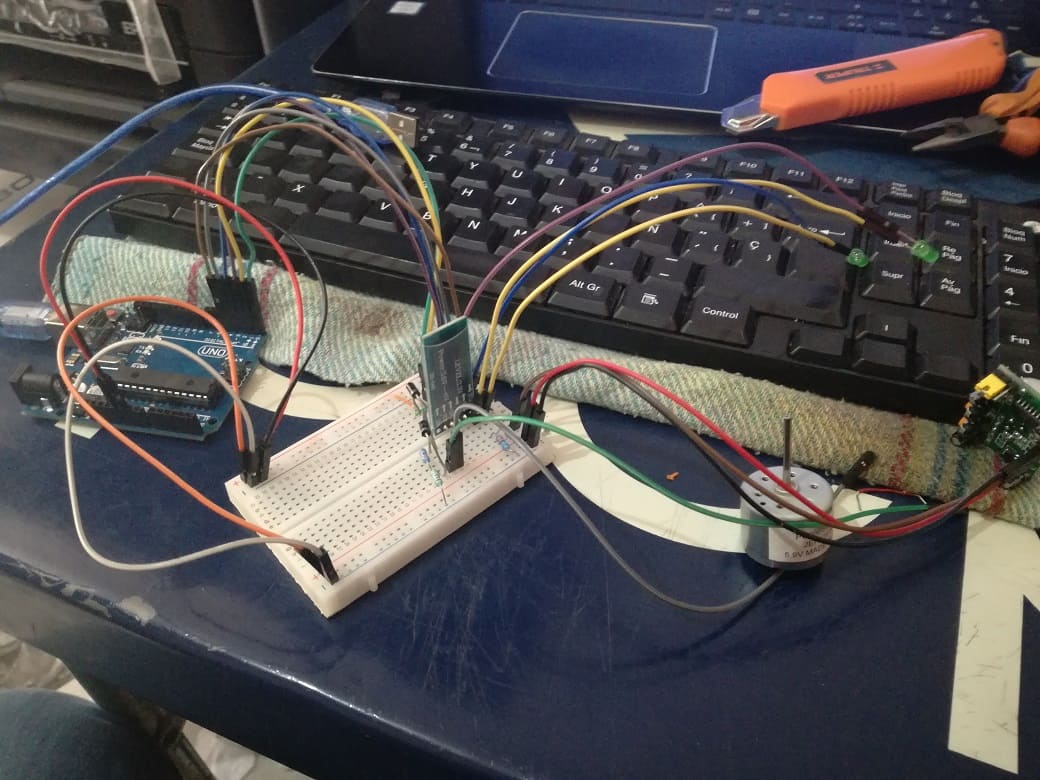
Electronic circuitry
It had been a long time since I touched an electronic circuit and some things I did not remember 100%, so I had to be very careful not to create a short circuit and break the Arduino board. Fortunately that did not happen. I used 2 diodes in places where I wasn't sure of the direction of the current to avoid problems (I think they were at the motor connection). And although I think that the LEDs do not need any resistor due to the voltage provided by the Arduino, I better put one for each LED that I was using.
I was also assembling the circuitry while programming in Arduino, first to do tests, and little by little I was putting everything in its place.
Many times I moved items and cables around because I found more efficient ways to place them, or there were less "messy" ways to connect them.
I made the following video at the time to explain to my team the progress I was having. In the video I show a simulation of counting 20 coins. Keep in mind that it is a simulation, so it still does not have a motor or a light sensor, but a great advance in the communication of both devices has already been appreciated.
When the Android application was ready and it was already communicating with the Arduino without errors, it was time to test the light detector, and it worked wonderfully. As I mentioned before, moving the light away from the detector means that the coins are passing through.
I finally finished making a circuit as efficient as I could. In case I need to make an extra connection or add larger cables, it would be very simple.

The box in which everything would be assembled would be the same box in which all the purchased elements came. It was still necessary to assemble everything in its place and see what openings had to be made in the box, but the electronics and programming were already finished.
By this time there were only approximately 10 days left before hand in the project.
Parts Assembly
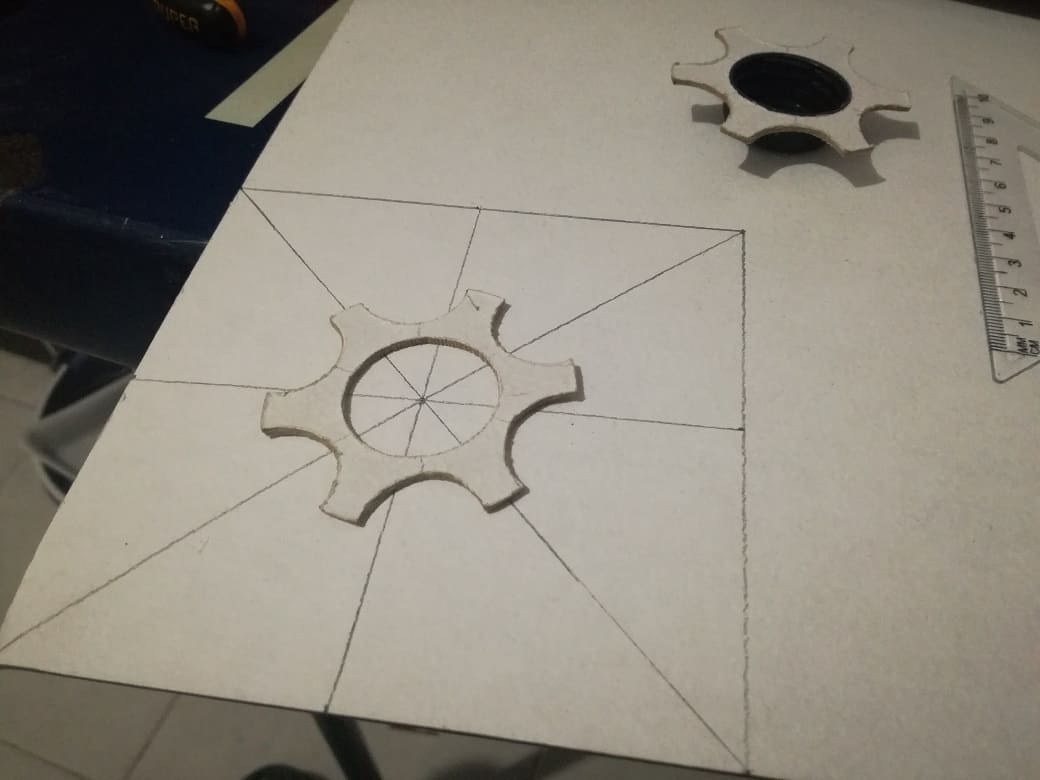
Since the beginning of the creation of the project I made several pieces of 'papel cascarón' that I was going to use (a 'papel cascarón' is a material that is selled in stationary stores of Mexico, they are very similar to illustration boards). I usually made pieces when I got bored of programming and vice versa.
In fact, by the time the electronics parts I had ordered online arrived, I had already done the coin input tray and the gear as well.
I had to investigate the dimensions of the coins well so that there were no errors.
All the pieces were separate. I would glue them together with silicone or some other glue when it came time to assemble the machine.
Knowing about geometry and trigonometry helped me a lot 😁.
Cutting the 'cascarón paper' (illustration board) was undoubtedly the most difficult part of the entire project. That paper is very hard to cut, at least with the cutting tools I had. Every day my hands and arms ended up aching, and the table where I cut the paper ended up full of cuts.
When I already had the pieces cut and assembled I realized that it was very easy for coins to get stuck in the input tray, so I would have to think of a totally different design.
Also, I was concerned that there was a chance that the coins might not go into the gear from time to time because the gear had 2 walls to hold the coin in place. So there were actually 2 problems.
As the days passed, I thought of new designs, but none of them convinced me.
Around the days when the Arduino and Android were first beginning to send information to each other, I came up with a design that solved both problems. I could put enough coins in and they wouldn't get stuck, and the gear wouldn't have to have walls to hold the coins in place. However, when assembling the machine now I would have to do some weight tests, since depending on the angle of the input tray and the weight generated by the coins, it could mean that the gear could not move correctly.

As it was a difficult design to represent with drawings, I wanted to model it on the computer. Since I didn't know how to use any 3D modeling program, I used Minecraft 😅.
In Minecraft, in addition to designing what the machine would be like, I also put wooden logs representing the wooden sticks that I would put in the machine to support it, since, up to now, in all the designs I made of the machine, it was held floating inside the box by magic.
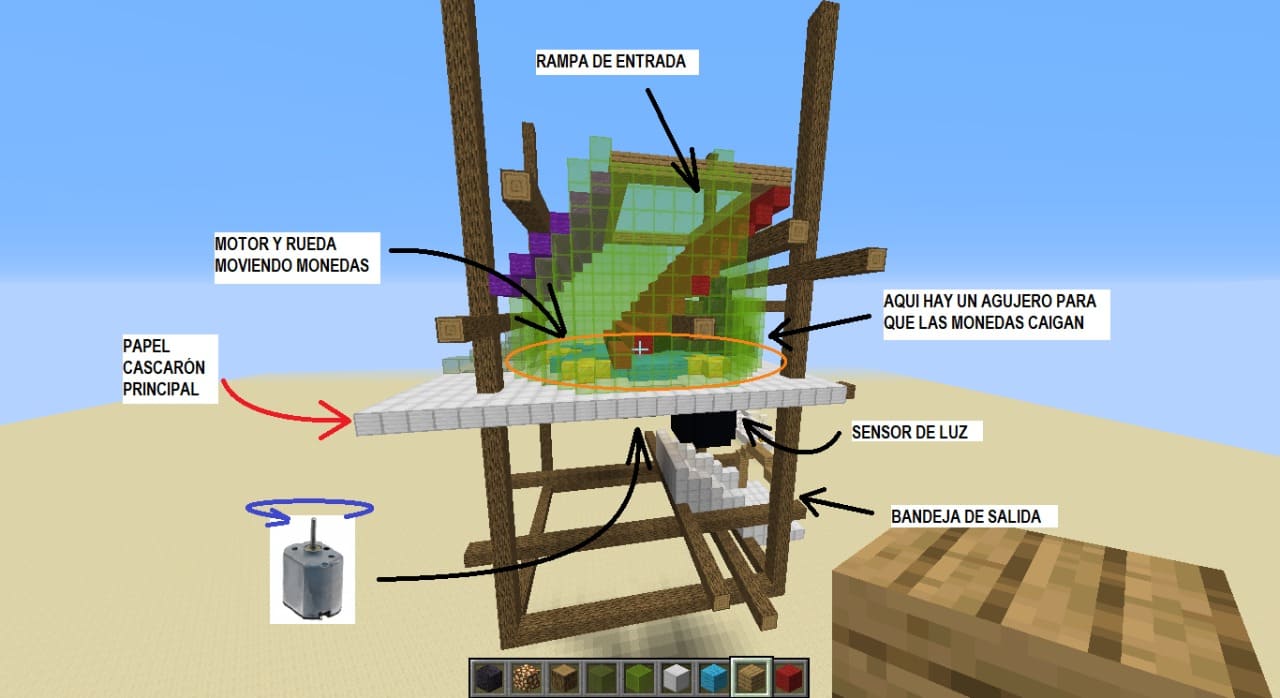
This design convinced me, and now I had to make the new pieces.
The rectangles in the previous images were going to be the wall that surrounds the gear with the coins. How I suffered cutting these things 😓.
By this time I already had the programming, the circuitry, and a large part of the new pieces made of illustration board and there was only 1 and a half weeks left to hand in the project. It had to work because otherwise I wouldn't have time to do another design. But problems arose.
Problems
There were about 10 days left for the hand in of the project. I still had to cut some pieces of illustration board, assemble the machine in the box, put the sticks in, glue the pieces together, make some holes in the box, and put the motor and sensor in place.
What I feared with the motor, happened. Doing tests I realized that, theoretically, the motor did not have enough torque to correctly rotate the gear with the coins on it.
I needed to buy a motor with a better torque and I didn't know which one or what types there were, I only knew that these motors were called Gearmotors.
All my advances and concerns were discussed with my team. They supported me and told me that they would give me money for the Geared Motor, or that they would get me one and send it to me.
Time was running out, any mistake or need to change something would cost valuable time.
There was almost no time because it was obviously not the only subject we had. We had exams, homeworks and projects with other teachers.
The same day that I was going to go downtown to see if there was an electronics store open to buy the Geared Motor (we were in a pandemic and possibly there were no stores open), we had a class with the professor of this subject. He had told us by message that today we would talk about the final project 😮.
Unexpected and bittersweet ending 😮😐😠😫😭
In case you didn't read the above, in summary: There were around 10 days left for the hand in of the final project. The teacher had told us that in this class we would talk about the project.
This day in class, the teacher reviewed some homework he had left us, and suddenly started talking about the final project.
He said:
"For the next week, in teams, you are going to hand in a final project. The final project is going to be: that by pressing a button, a servomotor rotates to one side, and if another button is pressed, it rotates in the opposite direction. And that would be it. That will be your final project and with that I will evaluate you all."
WHAT???!!!

I couldn't believe it, the teacher changed everything in the end and no one said anything. Maybe no team had done anything or I don't know.
I didn't know whether to say something at that moment since, as I said, there were still things to finish.
During the class, I asked my team through WhatsApp whether or not we would complain to the teacher for having changed everything, but everyone in my team thought this news that the teacher gave was great. We would no longer have to do such a complex thing, just make a simple circuit with 2 buttons and a servo motor (which one of the team already had).
I didn't know how to feel about it.
On the one hand, it was good because I would no longer have to worry about the following days finishing the machine (find the geared motor, assemble the machine, wait for it to work without errors, and, above all, I would no longer have to cut more pieces of illustration board).
But on the other hand, I felt angry and sad at the same time, because of everything I had been through. For so many sleepless nights and so much time and effort wasted on a project that was no longer going to be evaluated 😕.
...
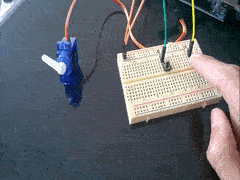
A couple of days later, the team member who had the servo motor had already done the job the professor asked for. She told us that she had already shown the professor that work, and that it had gone well for us.
In the end I got a 10 in the subject (the best possible grade)... 🤷♀️
...
Epilogue
In the end I did not finish the machine. I did not get, nor did I try to get the geared motor. What would I gain with that? Just having a cardboard machine that counts $1 coins.
I think that in the end everything was not so bad since I learned a lot during this time. I learned to use and program an Arduino board. I learned to work with Bluetooth. I got better at Android programming. And I learned that life is full of surprises 😅.
Perhaps one day when I have money to spare and a lot of free time, I'll pick up the project and finish it. Just to have it as a souvenir and take a photo or video showing that I finally finished it.
But for now, it's not in my plans.